Openers · Toronto
Photo-Eye Sensor Alignment or Replacement
After a cold night the door stays open until the garage warms up. There is frost on the sensor lenses and a ridge of salty slush piled against the brackets where the snow blower was parked.
Photo-Eye Sensor Alignment or Replacement
In plain words
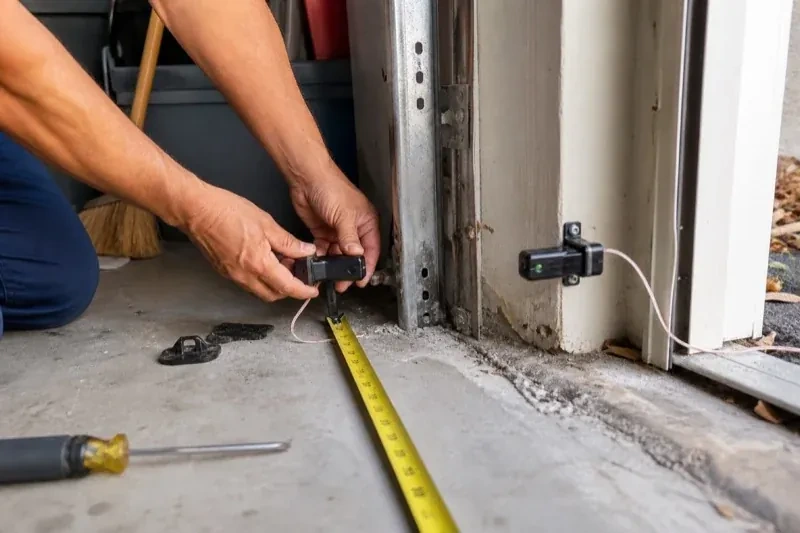
Most sensor visits end in alignment rather than new parts. The brackets that hold the sensors ride on the door track or the wall, and they get bumped by bins, tires and shovels until the two lenses no longer look at each other. The technician resets both sensors to the same height, loosens the wing nuts, aims the pair until the receiving light holds steady, tightens everything and secures the wire. Replacement is the answer when a lens is crazed, a housing is cracked, water has got inside or the indicator stays dark with good wiring, and then a pair matched to the opener is fitted.
How the visit goesAfter a cold night the door stays open until the garage warms up. There is frost on the sensor lenses and a ridge of salty slush piled against the brackets where the snow blower was parked.
Toronto
How the visit goes
Following the wire home
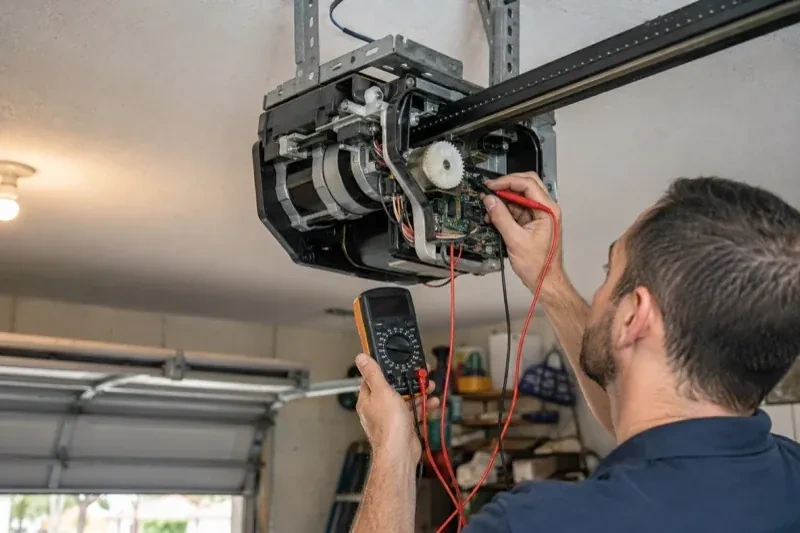
When the lights or the code point to the circuit, the low-voltage wire is followed from each sensor to the head unit. The technician looks for staples driven through the insulation, wire pinched behind a track bracket, sections chewed by mice, cuts where shelving or drywall screws went in, splices that have corroded, and terminals at the head unit that are loose or connected the wrong way round. A meter confirms continuity and polarity rather than guessing. Where the wire disappears into a finished ceiling, the readings at each end tell whether the hidden section is sound or whether a fresh run is the tidier answer.
Resetting the alignment
Alignment is done with the door open and the lights in view. The technician sets both sensors to the same measured height, loosens the wing nut on the receiving side, and turns the sensor a fraction at a time until its indicator changes from dark or flickering to steady. The nut is tightened while the light is watched, because a sensor can drift as the fastener bites, and the sending side is treated the same way. Brackets are checked for play and the wire is re-clipped so it cannot tug the sensor out of line. A steady light on both sides, held through a few door cycles, is the standard.
If it ever reverses again
Should the door start bouncing back up in the future, you know the order to check. Look along the floor for anything in the beam. Look at the two sensor lights for a dark or flickering one. Look at whether the door backs up as soon as it starts or only after touching something, since the second points to the door's settings rather than the beam. Note whether the opener light is flashing and how many times. With those four facts the cause is usually obvious, and if a visit is needed, the technician arrives already knowing where to begin.
Photo-Eye Sensor Alignment or Replacement
In the van
- Wire connectors
- Two-conductor low-voltage wire
- Insulated wire staples
- Matched photo-eye sensor pair
- Track-mount sensor brackets
What affects the quote
Same fees day, night or weekend
1Access to the doorway and the head unit
A clear strip along the floor and a reachable head unit make for a direct job. Shelving, vehicles or stored goods that must be moved to reach the sensors, wire or terminals add time.
2An opener without a sensor circuit
Where the operator predates monitored sensors and cannot accept a pair, the quote changes shape into a modern operator with its own sensors, which is discussed as a separate decision rather than folded in.
3Type of kit
Some replacement kits contain only the two sensors with connectors, while others include brackets and a full length of wire. The kit that suits the opener and the state of the existing hardware is what is quoted.
Photo-Eye Sensor Alignment or Replacement: questions
Is it all right to keep using the door until the visit?
Use the door in a way that keeps you in control. If the opener closes only while the wall button is held, do that only while you can see the whole doorway and nobody is near it. Otherwise close the door first if you can, then move it by hand with the manual release, and get help if it feels heavy or binds. Keep children and pets clear during any test. A door that reverses is being cautious on your behalf.
My opener has no sensors at all. Can they be added?
If the opener predates the entrapment-protection standard, which operators have had to meet since the mid-1990s, its board has no sensor circuit and a pair cannot simply be wired in. The positive news is that a modern operator brings the whole package: matched sensors, force reversal and a monitored circuit. The technician confirms the model first, because some units do have the terminals and simply had their sensors removed.
Could the wiring be the problem rather than the sensors?
Frequently. The sensors are fed by a thin two-conductor wire from the head unit that crosses the ceiling and drops down both sides of the door, and it is pierced by staples, cut by shelving screws, chewed by mice or pulled from its terminals more often than a sensor fails. Both sensor lights dark, or an opener code for an open or reversed circuit, points to the wire. The technician tests the run with a meter and repairs or replaces the damaged section.
Openers & Access
- Chain-Drive Opener RepairThe chain in the detached garage went orange with rust over the winter, the links are stiff, and…
- Belt-Drive Opener RepairThe belt looks fine from a distance, but up close the rubber has cracked across the back in dozens…
- Garage Door Opener ReplacementYou want the ceiling back.
Photo-Eye Sensor Alignment or Replacement near you
Broken spring, snapped cable, door off the track, opener humming but not lifting, remote lost, seal cracked, panel dented, door too loud for the bedroom above: those are the calls we take from Toronto, and each has its own service page explaining how we handle it.